

We have come up with a comprehensive guide to help you batch resize images in Windows 10.
With the increase in gadget presence in our lives it has become very convenient to click pictures and record videos whenever and wherever we want. Just a tap on the smartphones enables you to capture all the memories of your vacations and events. Undoubtedly this is no less than a blessing but this also means that you have an unbelievably large number of pictures in each folder.
And when it comes to resizing them, it can either be confusing or a daunting task. You might want to send someone pictures through email or upload them on your social media handles, but not having the appropriate size of these pictures can become a cause of frustration. If you try to use the usual Paint option in Windows, you will notice that this application only allows you to resize one picture at a time.
This conversion speed is neither a practical option nor possible when you have a bulk of pictures to resize. It goes without saying that it can take days and weeks if you even try to resize images through this approach. Not to mention, the hassle of maintaining the optimum resolution of the images you are trying to resize will get too much if you do not have an appropriate tool at hand.
How to batch resize images in Windows 10?
- Create a new folder: The first step is simply to create a new folder to hold all the pictures that you want to resize in one place. Right-click where you want to create the new folder, this can be your desktop or in the documents of Pictures folders. Then choose the New Folder option and name it.
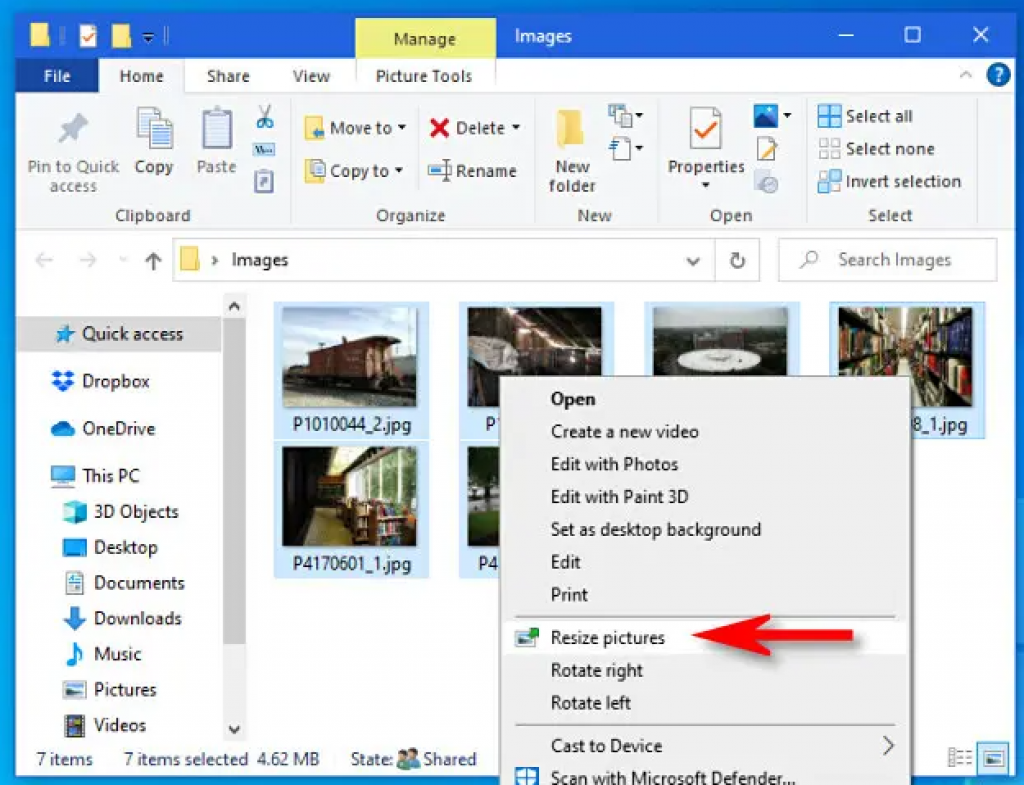
- Transfer the images you want to resize: Now after you have created a new folder, transfer all the images you want to resize to this folder. Bulk selecting the images is quite easy. Just hold down the Ctrl key while clicking on the images you wish to resize. After you have selected all the images in a folder, release the Ctrl key and right-click on any one of the images selected, and select Copy.
Now go to the folder that you created for image resizing and right-click anywhere and select Paste. You can also use the shortcut of Ctrl+V for pasting the images into this new folder. - Batch resize the images: The next step is to select all the images by pressing Ctrl+A. Then right-click on any of the images selected and select the Send To> Mail Recipient option. You obviously do not have to mail them to anyone yet but this is a necessary step.
Now, a small window named Attach Files will appear that will let you select the new size. The options available are Smaller640x480, Small 800×600, Medium 1024×768, Large 1280×1024, and Original Size. Choose the size you want for your images from these sizes. Next, you will be shown that there is no program available to support the action. Just close that window, and follow the next step. - Find your resized images: Now type %temp% in the search box of your Windows to reach the temporary files on your system. You will see the temporary folder created out of the images you just resized. Click on it and you will have your batch of resized images.
Why batch resize the images?
- Uniformity: Resizing your images is crucial not only for individual purposes but also for bloggers and website owners. Needless to say, uniform-sized images look crisper and enhance the over-all neatness of any website. You do not want the readers or viewers leaving your blog or website just because the images are making it look less appealing.
- Reduces the upload time: Whether you are looking to upload pictures on your social media handles or increase the traffic on your blogs or websites, resizing the images will reduce the upload time considerably. The browser has to resize the image every time the page loads as a result the speed is affected. This might cause many of the viewers to leave in frustration even before your blog has loaded.
Conclusion
Resizing the images is your best bet if you want to keep the whole image intact which is not possible in case you use the Crop tools. The best part about the method we have included is that not only the size of the images gets changed but also the size of the whole folder as well.
Thus, it also enables you to save storage space. If you want other options as well, you can even go for third party apps for batch resizing. You simply have to install these programs in your system and follow through with the resizing procedure.


![12 Best Hidden Spy Apps for Android [Free & Paid]](https://theviraltech.com/wp-content/themes/rehub-theme/images/default/noimage_336_220.png)
